Ikea Symfonisk Amp Modification Guide - A much cheaper Sonos Amp
A guide and video on how to modify an Ikea Symfonisk into a general purpose Sonos Amplifier.

Perhaps you've heard of Sonos. I have been a fan for a long time, but the prices for their products have always been far out of my financial reach.
Then Ikea started selling the Symfonisk Bookshelf Speaker for $99.00. I bought three. I love them. Brilliant sound, beautiful design, simple interface. Ikea even sells wall mount hardware for them. After living with them for a few months, I realized that in my bedroom and bathroom, I wanted SONOS, but I didn't want a bookshelf speaker taking up the space. Like any other nerdy home owner, I wanted some cool in ceiling speakers instead.
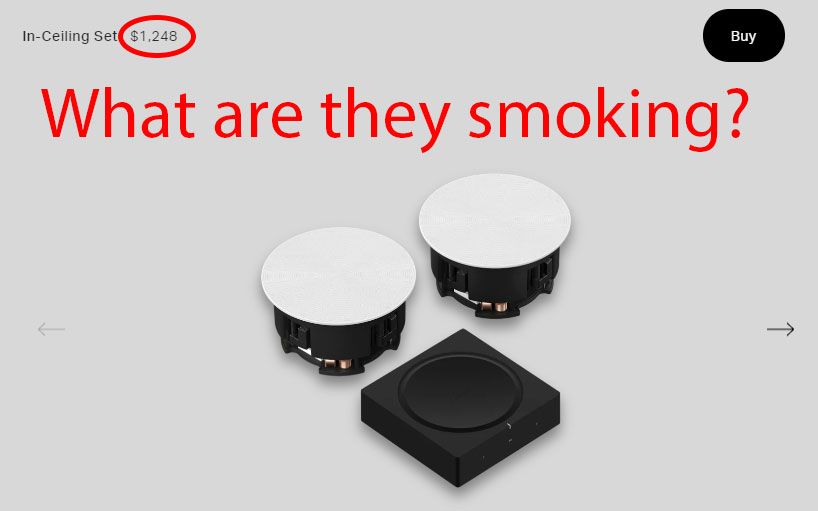
So imagine my shock and awe when I went to order two in-ceiling Sonos speakers and almost choked at seeing the price - $1248 for two speakers and a Sonos Amp.
Surely there must be a better (cheaper) way. Fortunately there were several amazing folks who paved the way for this solution. First for me is Mr. Todd Parker whose YouTube Videos on various Symfonisk Hacks were instrumental.
Next was this amazing article explaining the Mono Bridge mode on the TPA3116 Amp (the same amp in the Symfonisk speaker).
This laid all the technical groundwork to prove that the Symfonisk speaker should work as a general purpose mono speaker amp. But how well does it work, how much money do you really save, and is it really worth the hassle? In a word, absolutely.
How much value is there?
Following this guide takes about two hours start to finish, taking your time along the way. The last amp mod I did I timed at 43 minutes. So not a ton of time to invest.
If you're a DIYer already, there's also not much to spend. At an absolute minimum you need some binding posts, a Symfonisk Speaker and a ceiling speaker for each output location. So for a two speaker setup, minimum cost is $320. Thats 75% less expensive.
If you're totally new to DIY, and have to literally purchase every single tool, you're looking at about $600. Still a 52% savings.
And if you want to follow this guide and make your own enclosure, throwing in the cost of a decent 3D printer and filament, is still 29% less expensive at about $900.
Follow along with the video guide
My video guide goes through in depth the full process and disassembly of the Symfonisk itself. This article will focus on the details, pinouts, process, and alternatives.
Modding the DAC (Digital to Analog Converter)
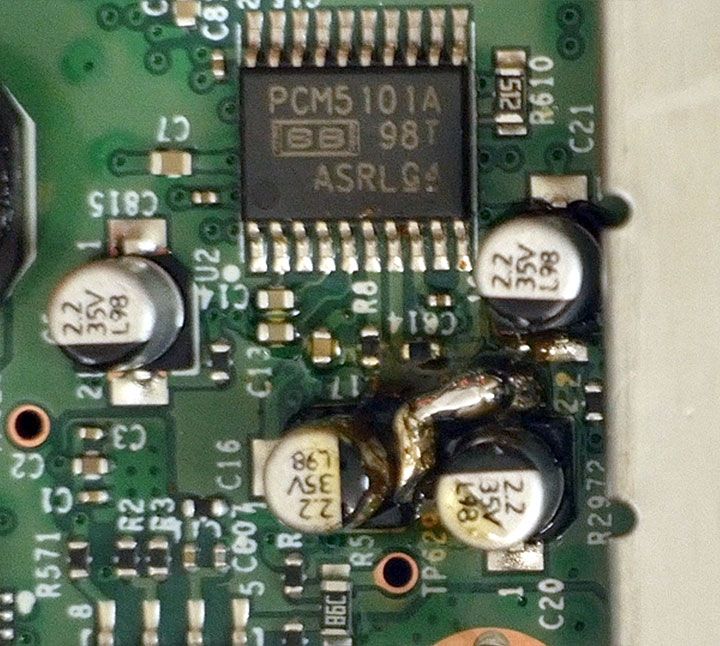
The DAC, a TI PCM5102, is located on the top of the PCB. We can check the pinout to see the work we'll need to do.

Basically, in order to use the amp's bridge mode, we need to create a two channel crossover to recombine the separate audio channels into a mono channel. Even though this is a stereo DAC, Sonos uses it as a bi-amp mono DAC. The audio input (pin14) is separated from the CPU into frequency bands to match the two speakers in the Symfonisk. This work has already been done for us by yondermogul at Instructables.

In a nutshell, we need a jumper across these two pads next to the capacitors. If you're really into hi-fi, and really good at tiny SMD component soldering, you could probably get a little better performance from the cross-over by swapping the 4.6Ohm resistor for some 10k's. But it really isn't necessary because we can still use TruePlay tuning to fix up everything after installation.

These are the two basic options for bridging. On the left is using a very small piece of bare jumper wire. There are no exposed traces between these pads, so you don't need a shielded wire to make the connection.
On the right is using a piece of 24ga or 28ga silicon wire. I highly recommend this method. It is much easier, faster, and cleaner. Also easier to remove if you ever want to reverse the process.
Modding the Amp
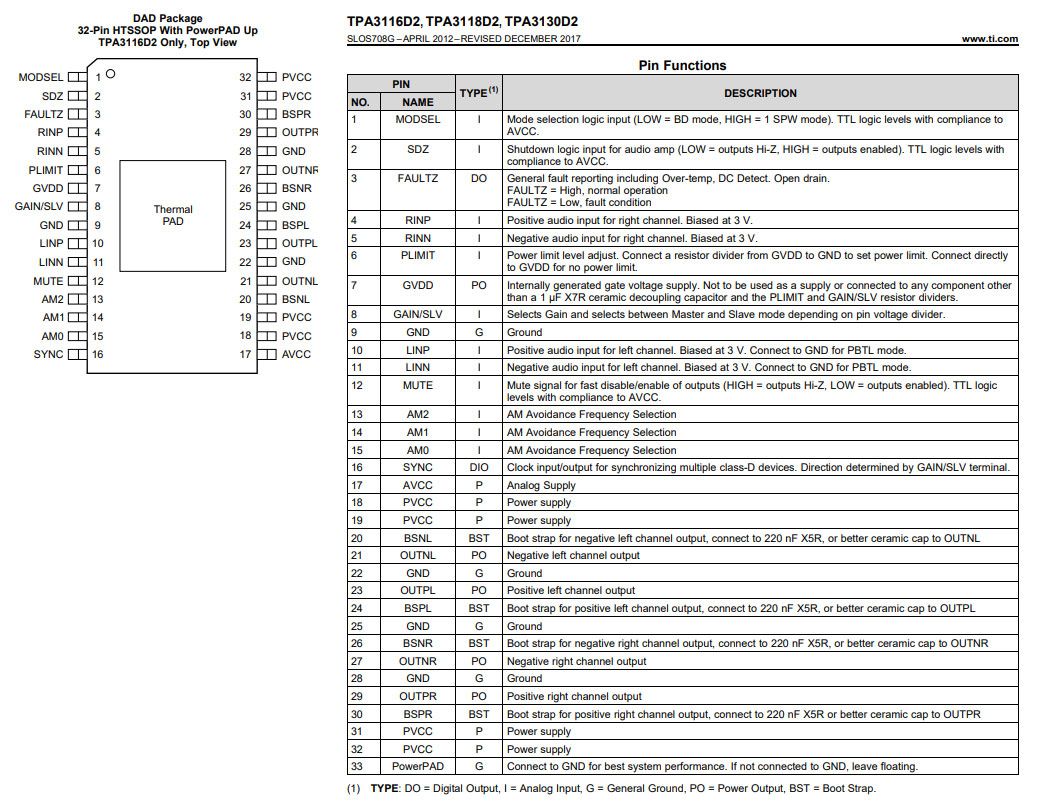
The amplifier on the Symfonisk speaker is the TI TPA3116D2, a two speaker amplifier allowing 30 watts per channel in stereo mode, or 100 watts in a bridged mono mode.
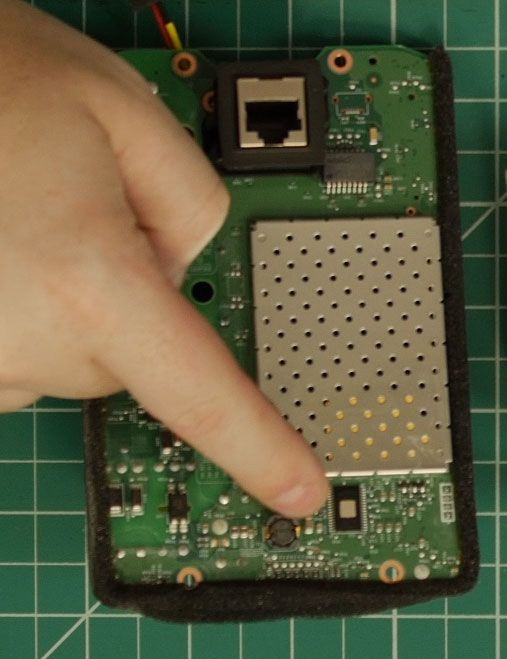
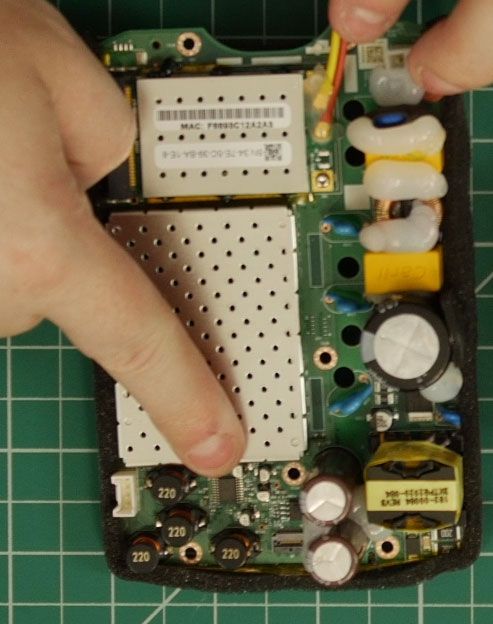
The amp is located on the bottom of the PCB and is the reason for the huge heatsink on the Symfonisk.
Fortunately, thanks to the combination of a great article and great documentation, this is a pretty straightforward process as well.
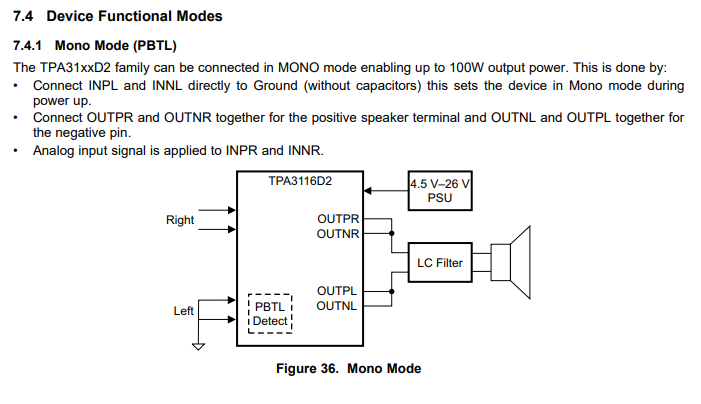
Basically, we need to only use the right inputs, bridge the left inputs to ground, and combine the outputs into right channel for positive, left channel for negative.

Once again there are two approaches to this.


On the left is the preferred method. Desolder the left channel inputs, pins 10 and 11, from their pads, lift them with a utility knife, push them onto pin 9 (ground), and drop a little solder on the trio. This approach is easy to reverse to put the amp (and the whole Symfonisk speaker) back into its original state.
On the right is the "easy" way. Use a utility knife to cut the traces as shown, then drop a solder blob across the three pins. This takes a minute or less, but it means you can't ever use the Symfonisk as anything other than a mono amp after this.
Bridging the speaker output wires
Now the hard part is done. The last step is handling the new output wiring.
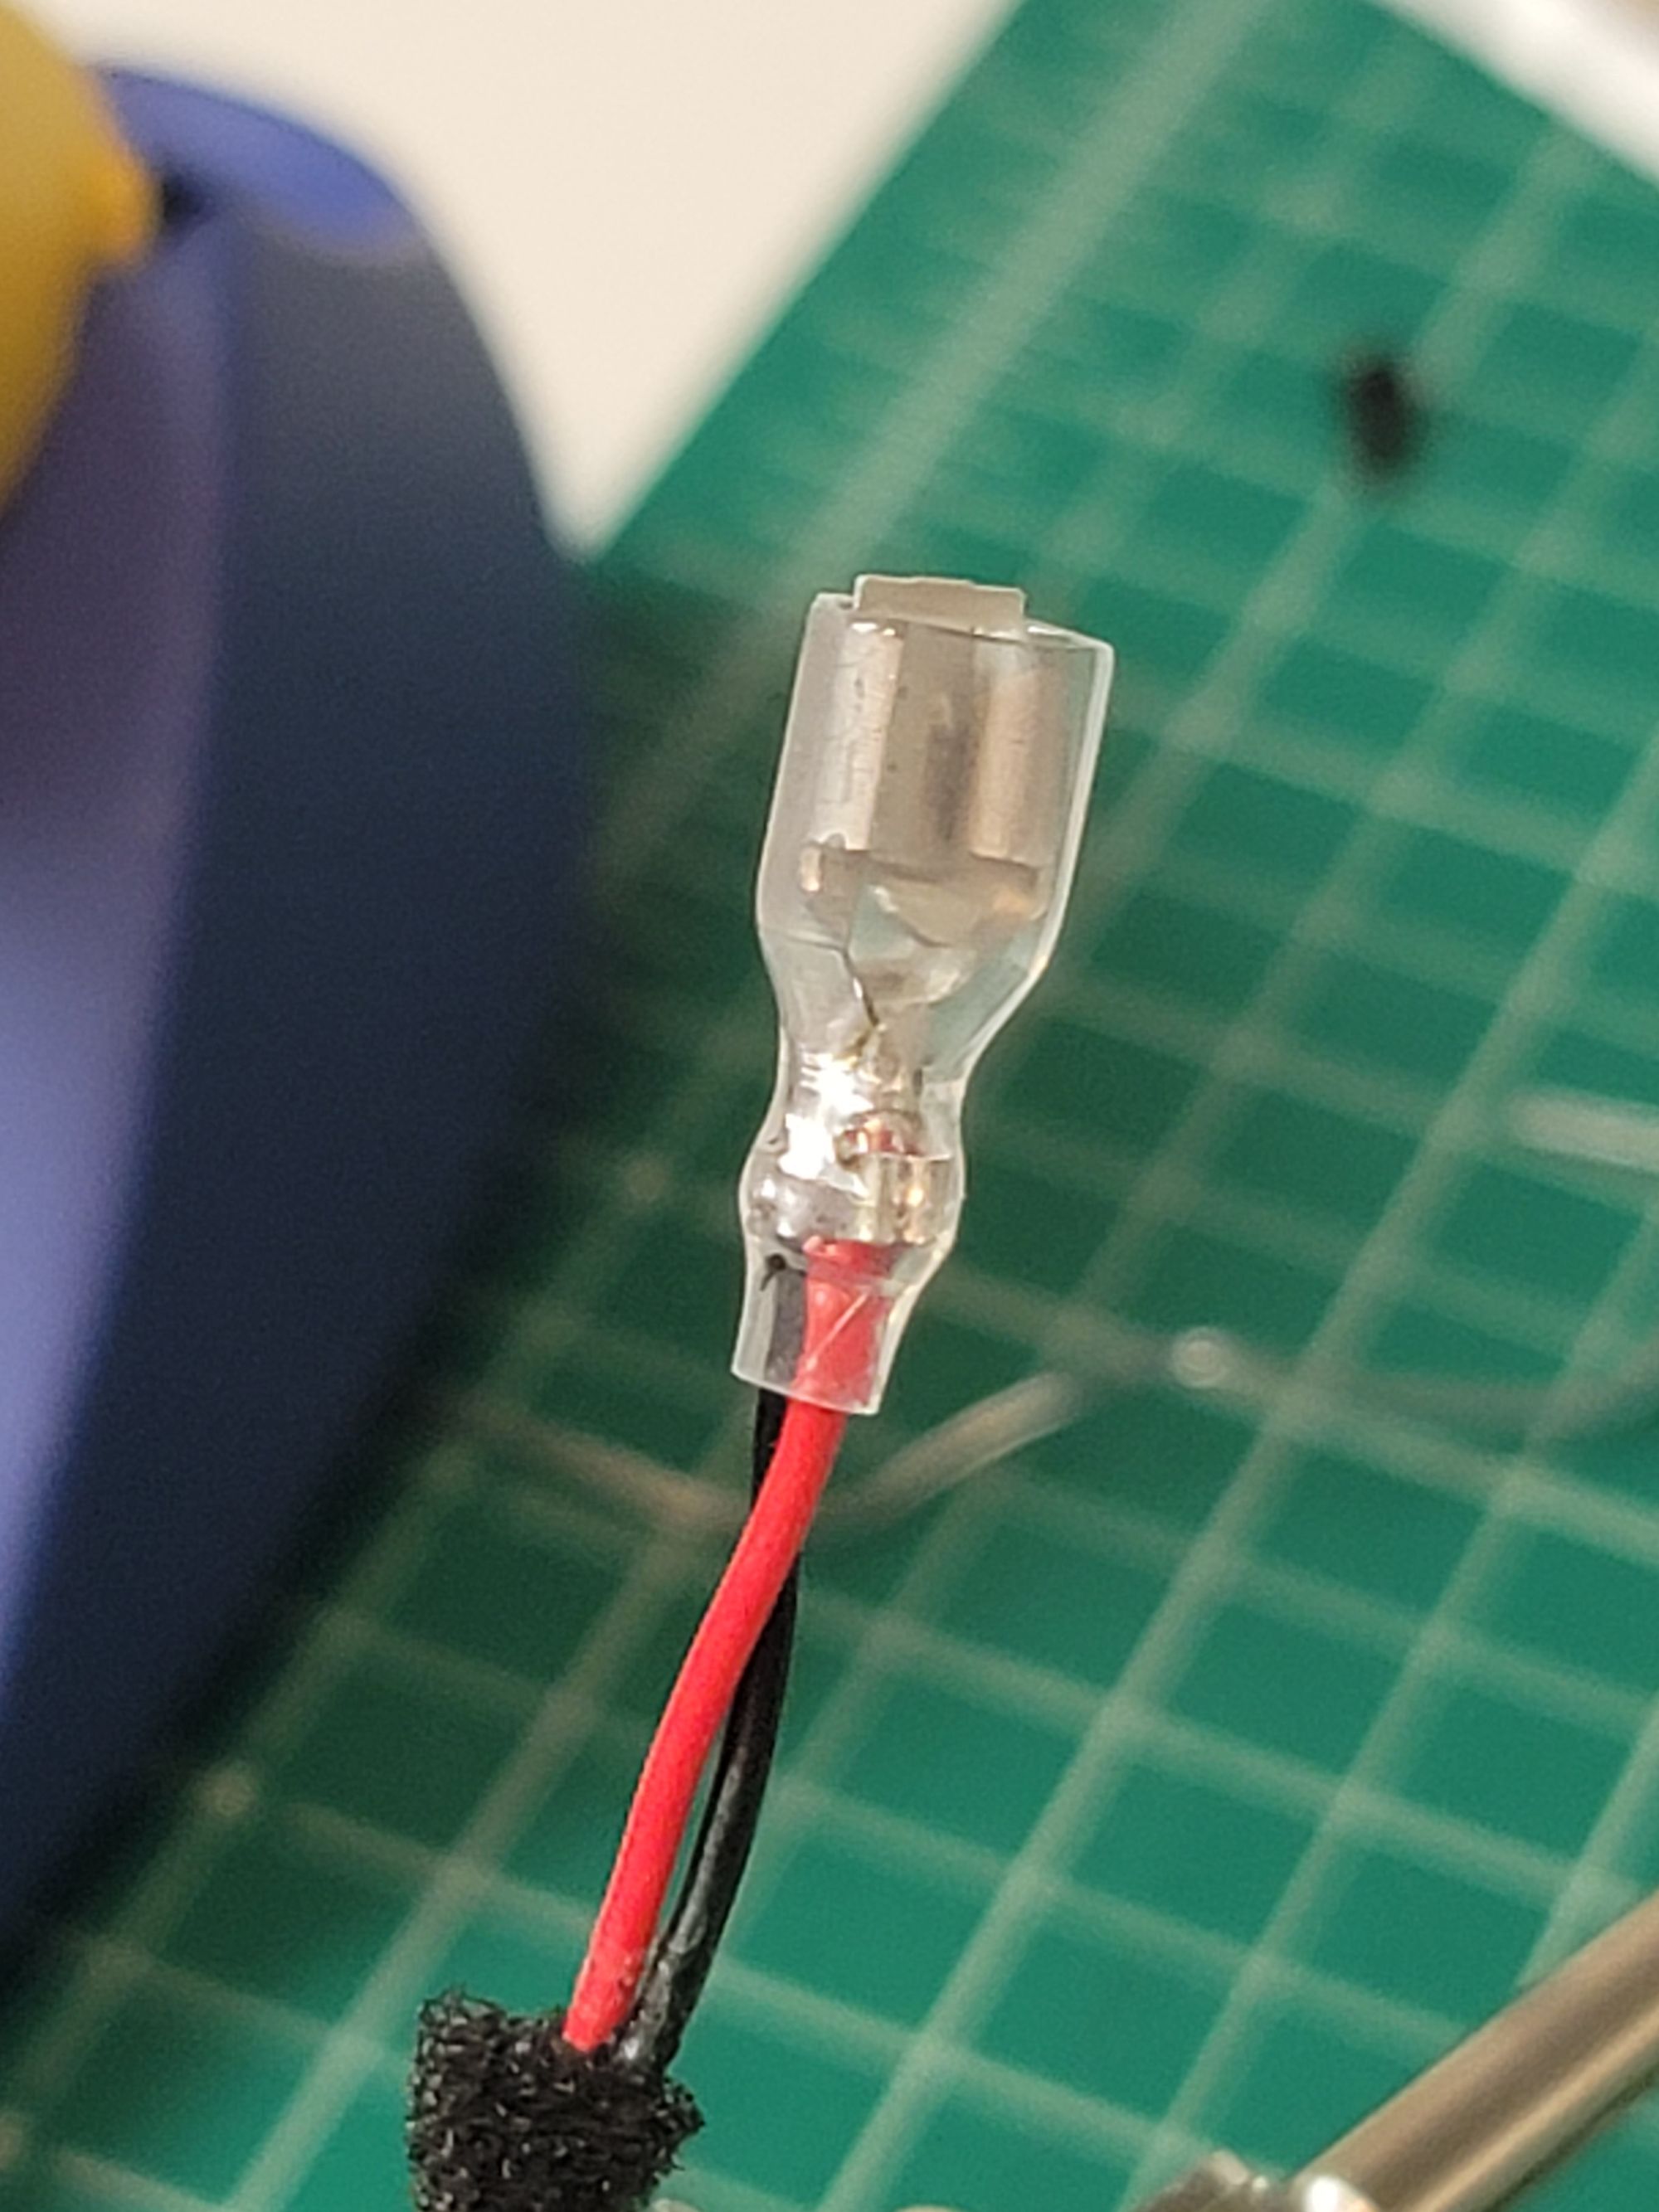
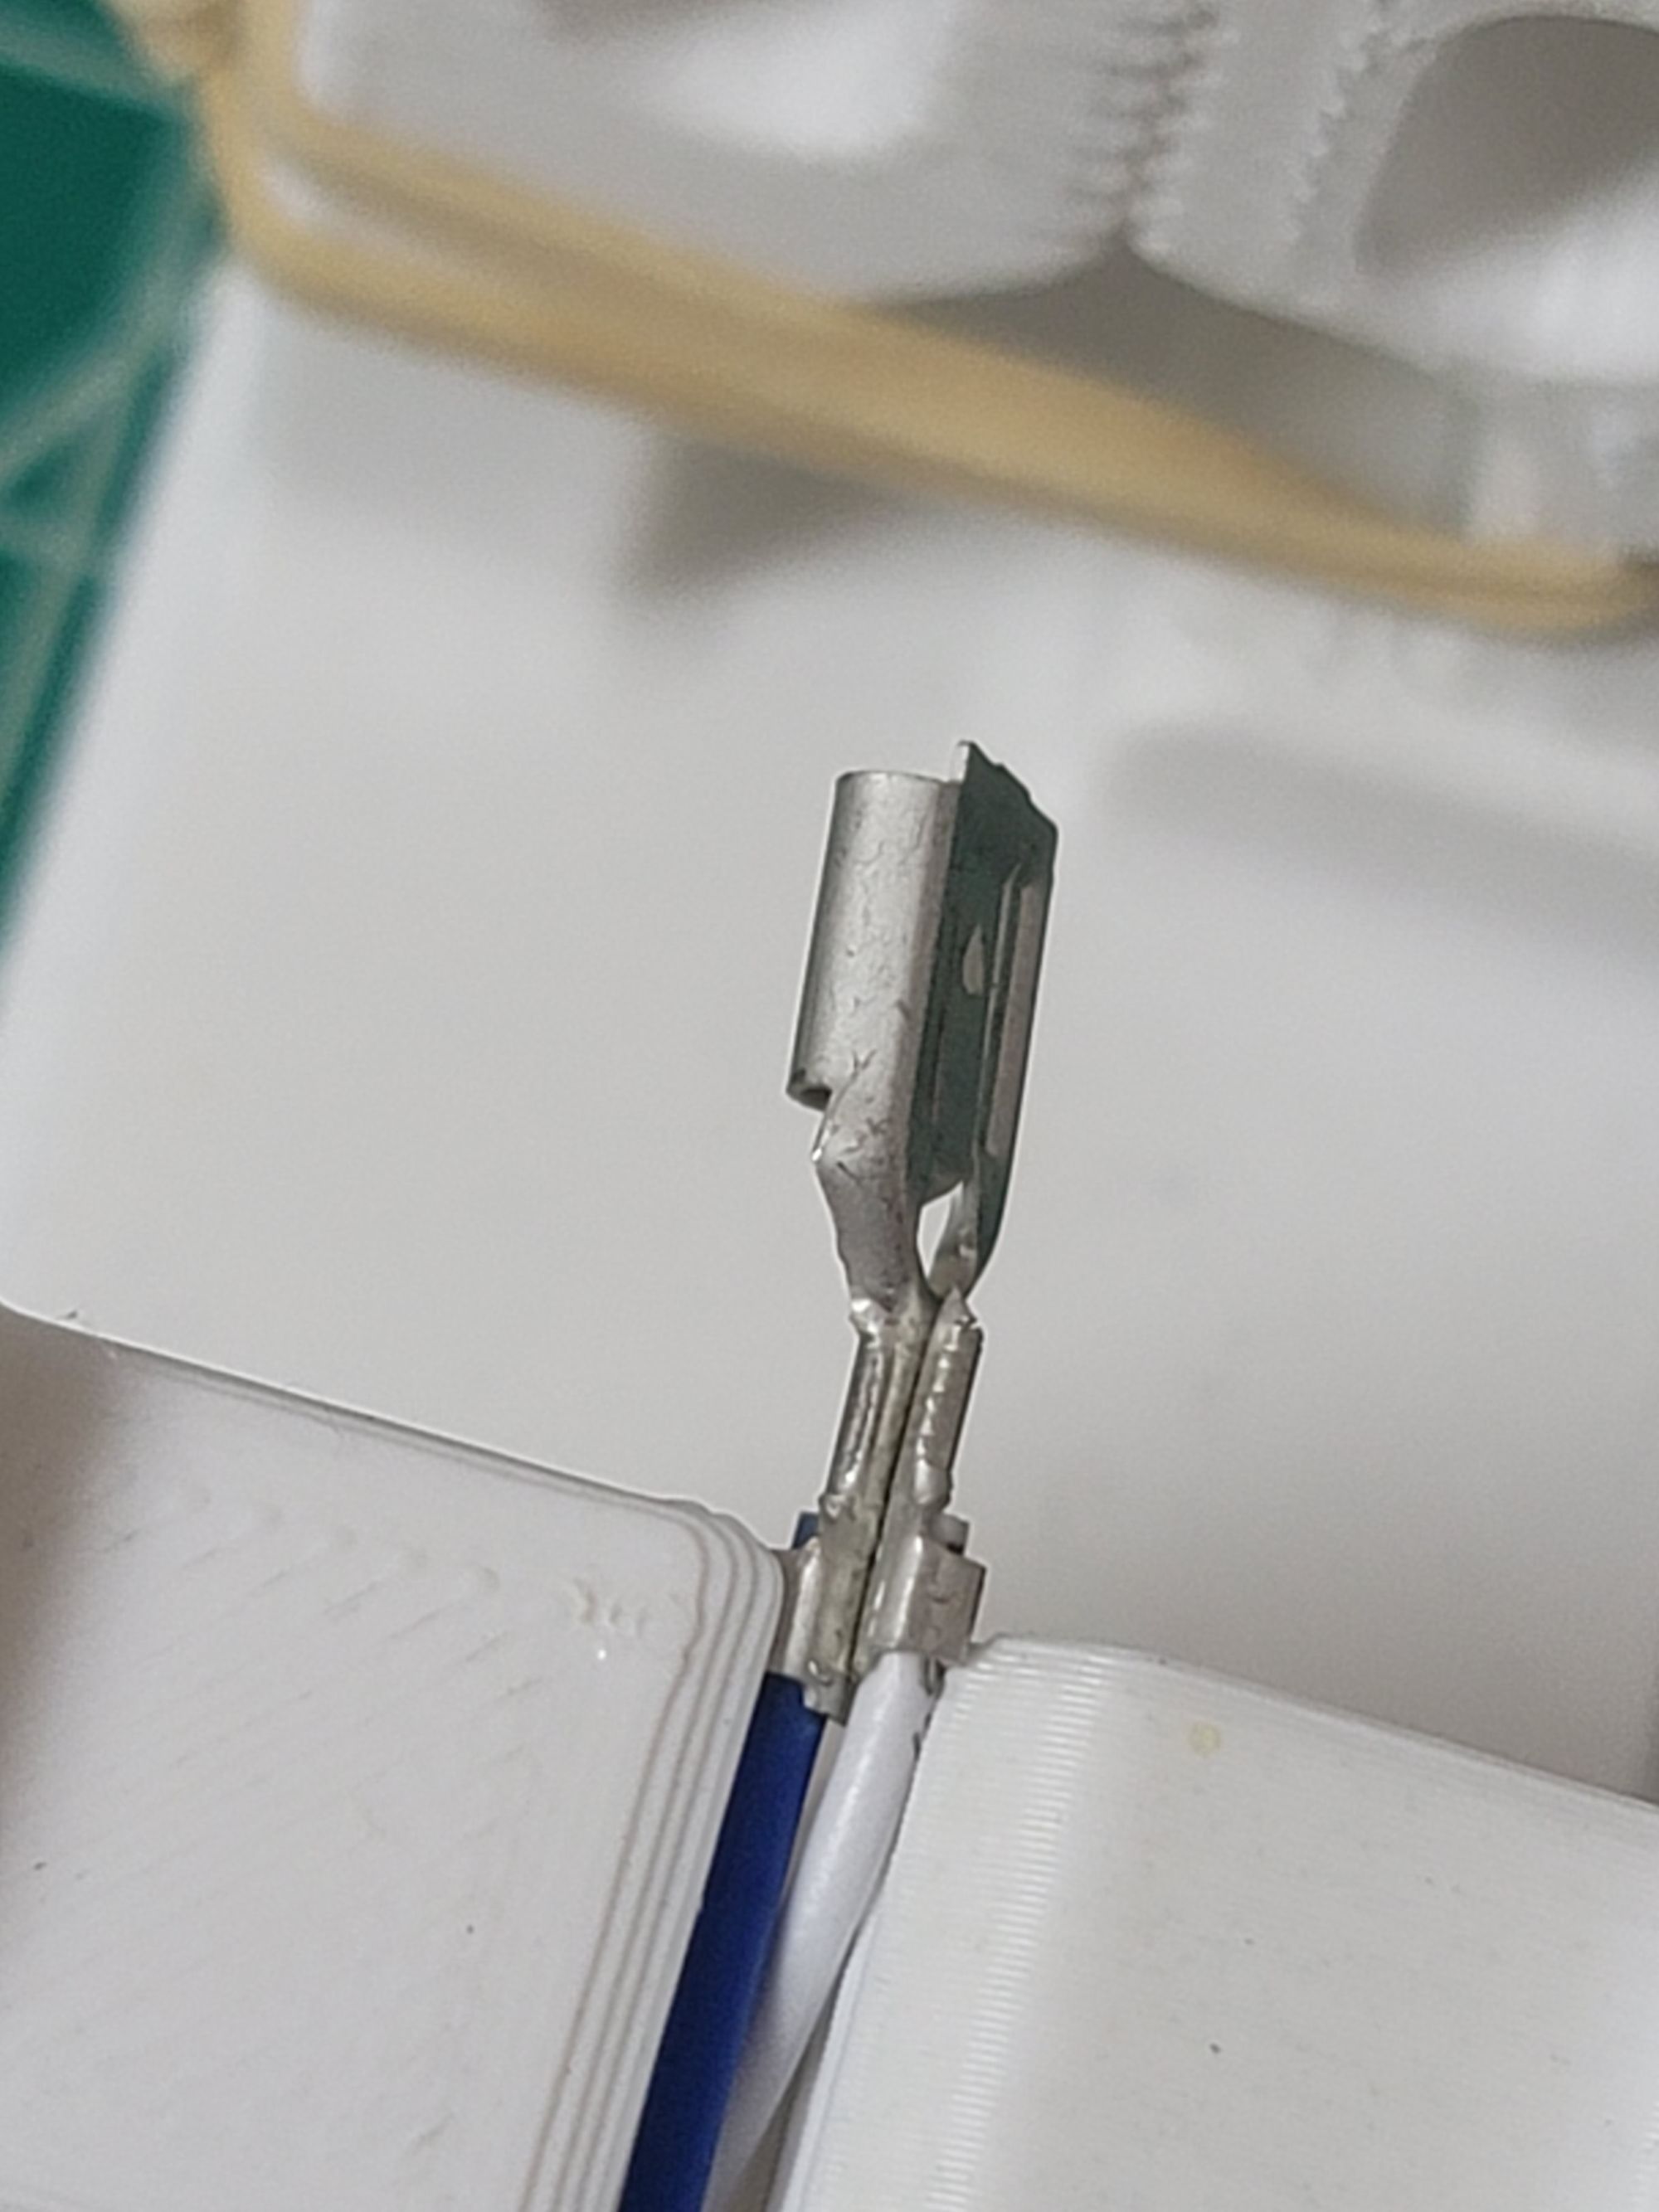
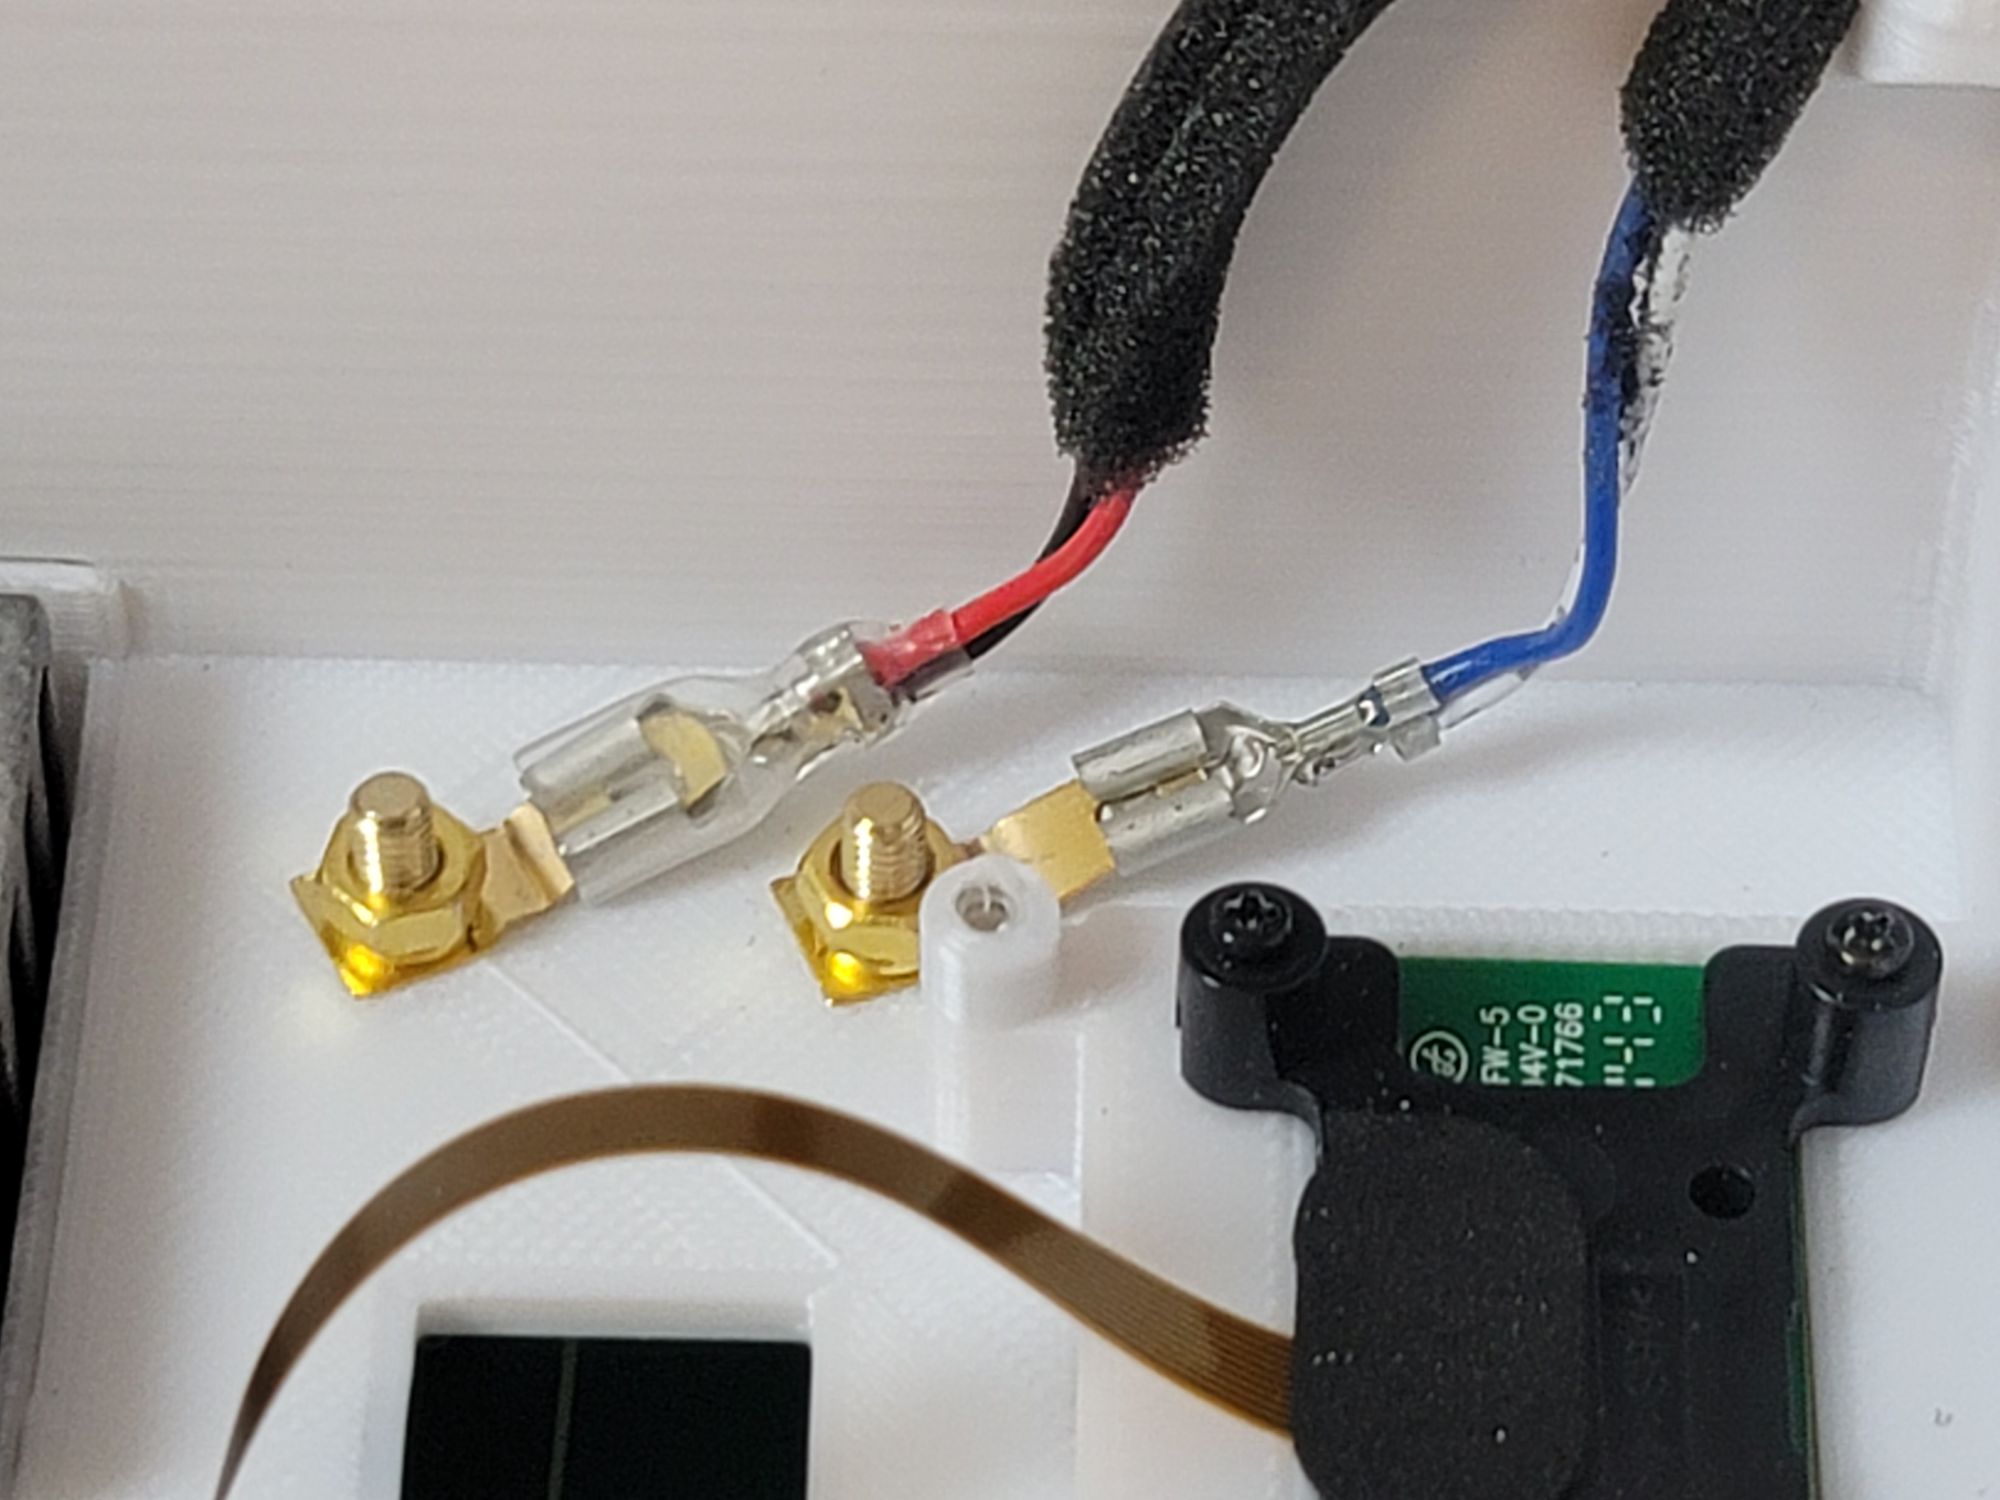
Fortunately this is pretty easy too. Most binding posts use the same terminal connector as the large connector on the Symfonisk. So clip off the end of the small one, solder the red/black and white/blue ends together, and Bob's your uncle.
Red/Black is your new positive wire, and Blue/White is your new negative wire. You could also directly wire new leads from the PCB, but there's really no purpose in doing so. The output pads are already sized for this gauge wire, you aren't going to get much out of using heavier gauge, or combining into a single wire at the PCB given the very short run length.

Hook them up to some binding posts and connect your speakers. Then turn everything on, grab an iPhone and run TruePlay tuning on the speaker.
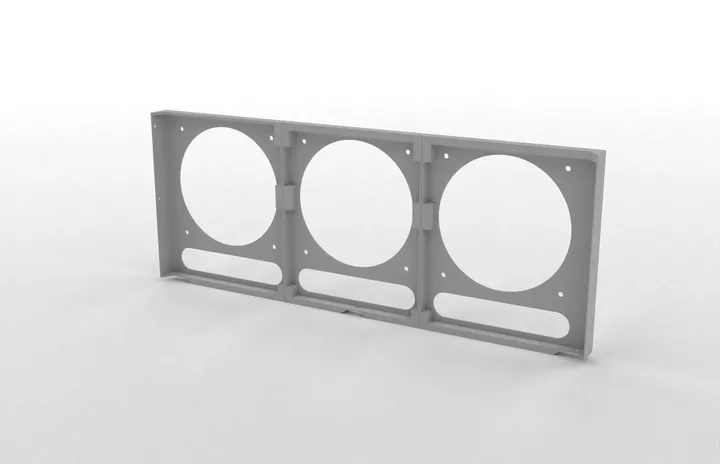
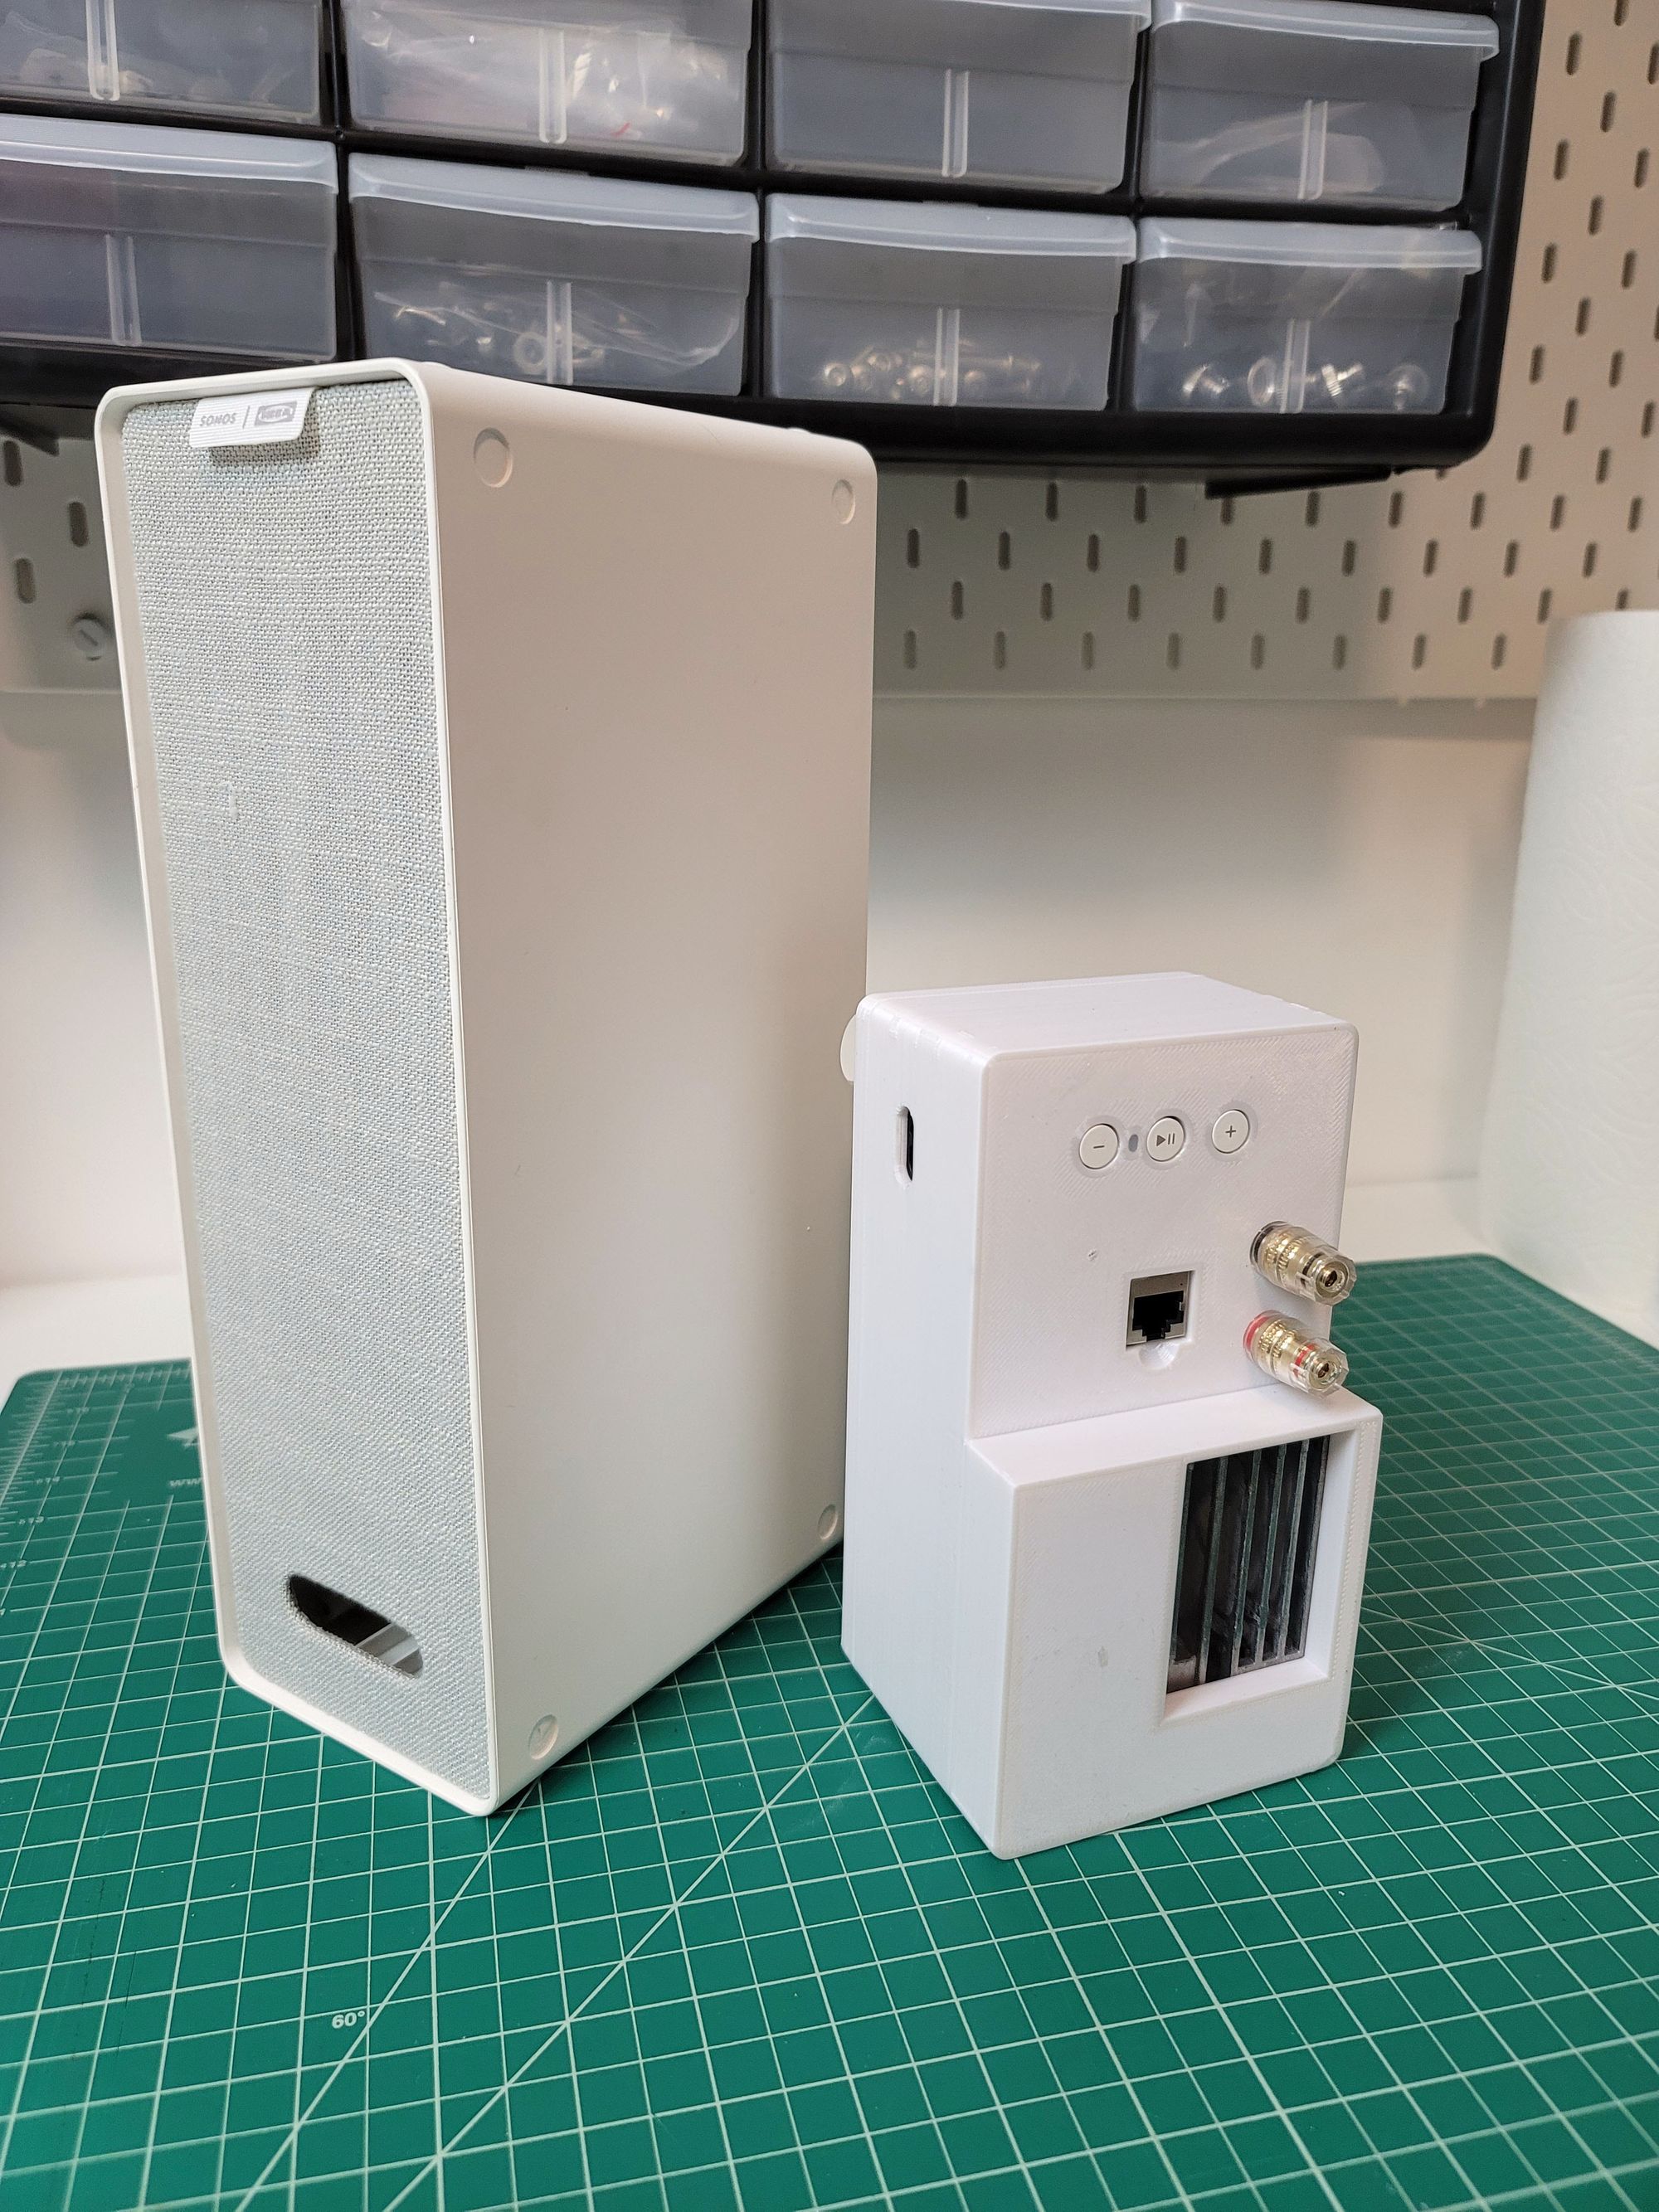
Using a custom enclosure
Since we aren't using the speakers anymore, it doesn't make a ton of sense to use such a large enclosure for an amp. It definitely saves money to do so, but if you want to go the last mile and put this project in a fit for purpose case, check out the companion guide for the 3d printed Sonos Amp enclosure here. As you can see it's less than half the size and is designed to be mounted to a stud nearby your in-ceiling speaker.
The BOM (Bill of Materials) for this project
Here's the list of everything you could possibly need to get this mod done. You probably have most of it already. The products below are either ones I personally own, or if I ever needed a replacement, what I would personally purchase.